
Microgreens are ‘baby plants’, growing to only 1-3 inches tall when harvested. Reaching the harvest stage can take anywhere from 1-3 weeks, depending on the type. They can add color, texture, and interesting flavors to meals. Additionally, research has shown microgreens generally have higher concentrations of vitamins than the same plants grown to maturity. They can easily be grown indoors at home and are a great way to get your greens over the winter!
How to Grow Microgreens
Step 1: Choose your seed. Some of the more popular seeds used for microgreens are broccoli, dill, basil, arugula, beets, and mustards but there so many more great ones to try. Here are some online seed catalogs that carry microgreen seeds (we do not endorse any companies).

Step 2: Choose your growing media. The most popular media used are peat-based soilless media mixes or hydroponic mats constituted of natural (cotton, kenaf, hemp) or synthetic fibers (rockwood). Fertilizing isn’t needed with microgreens so make sure soil based media has little or no added nutrients. A rule of thumb is the large seeds should be grown in soilless media and not on hydroponic mats. This is because they need to be covered with a small layer of soil in order for the seed coat to shed itself from the emerging first set of leaves. Smaller seeds on the other hand can be grown in soilless media or hydroponic pads. Keep in mind that the following seeds do not do well on hydroponic mats and you will need to use soilless media if you choose these: beets, sunflowers, buckwheat, cilantro, peas, and chard.

Step 3: Choose your container. Repurposed shallow food containers, flats, plastic Tupperware and more can be used to grow microgreens. Just make sure to choose a container with holes in the bottom so the water can drain. You will also need a tray, lid, or something that can be place underneath to serve as the saucer to catch/hold water.

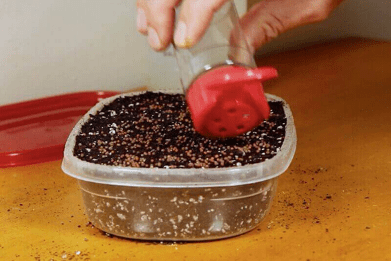
Step 4: Sow your seeds. As a general rule of thumb, medium and large seeds such as peas, sunflowers, beets, chard and cilantro should be soaked in water for 12 hours prior to planting to help speed up germination. Make sure soil is moistened and fill to top (do not pack down). If using hydroponic pad, submerge pad in water prior to spreading seeds. Sow seeds thickly and evenly. Only seeds that have been pre-soaked should be covered with soil (except sunflower seeds). For all other seeds, gently press the seeds into the soil with your fingers. Just making contact with soil, not covering with soil.
Step 5: Cover container until seeds have germinated. The first 3-5 days after planting should be a “blackout” period. Light isn’t needed, but the humidity and warmth is. Mist the seeds every 12 hours.

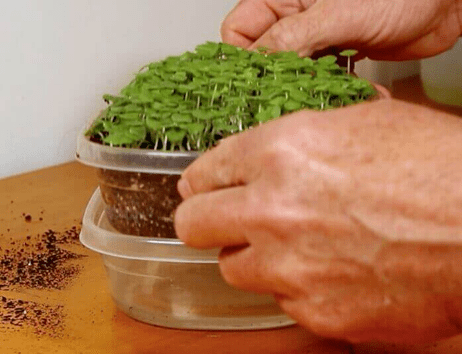
Step 6: Water and provide light to your growing microgreens. After the 3-5 day blackout period, once plants are up and growing, place container in a sunny window that gets 6-8 hours of sun per day. Run a small fan or gently run hands over the greens once a day. Most grow well at room temperature (70 degrees). You will want to stop misting your plants now and instead bottom water using the tray, lid or whatever you are using under the growing container. Top watering causes mold and rot issues.
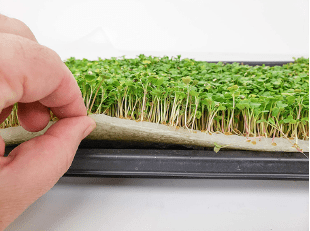
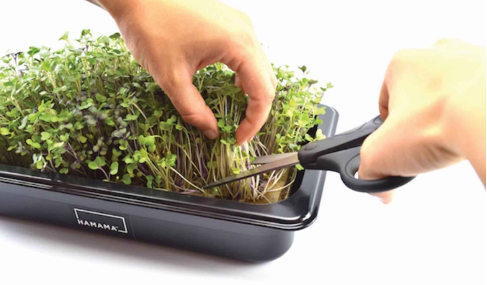
Step 7: Harvest your microgreens! Most microgreens are ready to harvest within 7-10 days. Use sharp scissors to harvest just above the soil. Plants will regrow but you will not get a significant amount on a second cutting so it’s best to start over. Make sure you use new soil and/or a new hydroponic mat each time. Avoid rinsing microgreens. Store in a sealed container in the refrigerator if not eating immediately.
Need more information?
Click here for informational video links and more on how to grow and care for your microgreens:
https://www.bootstrapfarmer.com/blogs/microgreens
https://www.trueleafmarket.com/pages/how-to-tutorial-videoshttps://extension.psu.edu/a-step-by-step-guide-for-growing-microgreens-at-home
https://extension.psu.edu/a-step-by-step-guide-for-growing-microgreens-at-home
Submitted by Faye Kuosman, Agent for Horticulture, Woodford County Cooperative Extension Service

You must be logged in to post a comment.